Last updated
Set up outgoing email settings
This article describes how to set up a custom email sender address for your live marketplace.
Table of Contents
Setting up reliable email delivery is crucial for your marketplace to work properly. It is also important to brand your email sending name and address to look professional and polished.
We offer two ways of managing email sending from your marketplace. The default option is to rely on a managed service offered by default in Sharetribe. If you wish to obtain more flexibility and control over your email sending, you can integrate Sharetribe with your own SendGrid account.
The following sections offer an overview of the two methods and how to configure them.
Managed setup
Sharetribe uses SendGrid as an email service provider. By default, we manage your SendGrid account and settings automatically, and the costs are included in your Sharetribe subscription.
When you have your live environment created, you can set up and validate the outgoing email settings if you use a custom domain. Follow the steps below to enable email sending with a custom domain, and increase the chances that your emails will be delivered reliably.
1. Add sender name and address
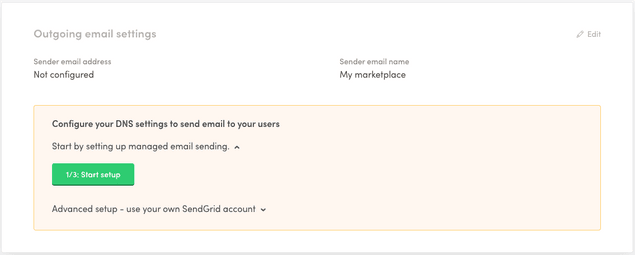
Make sure you select your live environment in the top navigation in Console. Then head on to the General settings page in the Build section. You can see the outgoing email settings below the marketplace information:
Click on the "1/3 Start setup" button to start the setup. Follow the instructions in the UI.
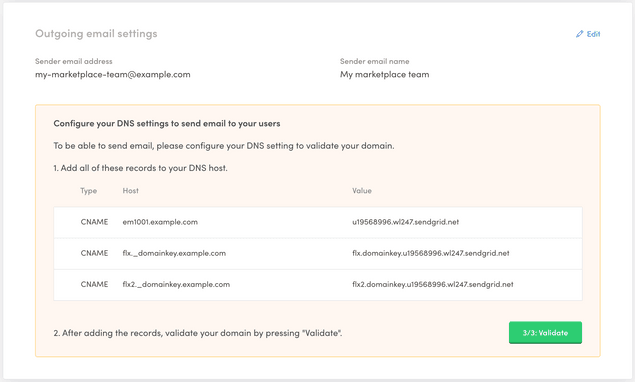
When you have added your sender email information, you will be prompted with DNS information:
At this point, we have created a SendGrid subuser for you, stored the information, and authenticated the given sender domain to SendGrid. This means that you have allowed this SendGrid subuser to send emails from this domain.
2. Configure DNS
Next, you need to point your DNS entries from your DNS provider to SendGrid. This is an important step for your sender reputation and your email deliverability. You should add all the records in the table visible in Console.
These DNS provider video tutorials by SendGrid might be useful if you are not sure how to configure the DNS records for your specific DNS provider.
If you still have trouble adding the records, see the SendGrid article on Troubleshooting Sender Authentication.
3. Validate DNS
When you have configured your DNS, you still need to validate the records for your emails to work. You can do that by clicking on the "3/3 Validate" button in Console. If everything is set up correctly, you should see a success message in Console:
Whenever you change your DNS records, you can revalidate to check that everything is set up correctly.
Troubleshooting failing validation
Note that when you make changes to your DNS, the changes might take a while to propagate. SendGrid recommends that you give up to 48 hours to make sure your latest changes are in use. Some of the records might propagate faster than others, so be patient.
Some DNS providers append your top-level domain automatically to your DNS records. For example, if you are using GoDaddy, Amazon Route 53, or Namecheap, make sure that your domain isn't duplicated in the DNS entries. For more information see the tip at the end of this section in the SendGrid documentation.
For more information, see SendGrid's Troubleshooting Sender Authentication documentation.
Using your own SendGrid account
In addition to using the managed email sending, you have the option to choose to use your own SendGrid account by integrating it with Sharetribe. You might want to do this because:
- You want to see exactly what emails are sent from your marketplace and fix problems (like bounces) with users' email addresses.
- You want to see open rates and other statistics about the email notifications that were sent.
- You are also using SendGrid for your newsletters and other marketing emails, and want to have all your email-related data in one place.
- You want to use your own IP address for email sending and reputation.
If you'd prefer to get access to such features and statistics, this is possible by connecting your own SendGrid account to Sharetribe. Just remember that doing this means you'd be subject to SendGrid's standard pricing for all outgoing emails.
Follow the steps below to set up your own SendGrid account for email sending:
1. Create an API key in SendGrid
Please, refer to the SendGrid instructions on key management.
You should create a key with Restricted Access with Mail Send
configured with Full Access permission. Make sure that your key has
the correct permission in place, otherwise email sending from Sharetribe
will not work. Make note of the key while creating it, it will be shown
only once.
Also, you need to make sure that you have configured your domain in SendGrid by following their instructions on how to configure domain authentication.
2. Enable using own SendGrid key in Sharetribe Console
Log in to your Console, and select your live environment. There are two options for integrating SendGrid. You can do it during the initial setup of the marketplace or later if you wish to change from managed setup to using your own SendGrid account.
During initial setup
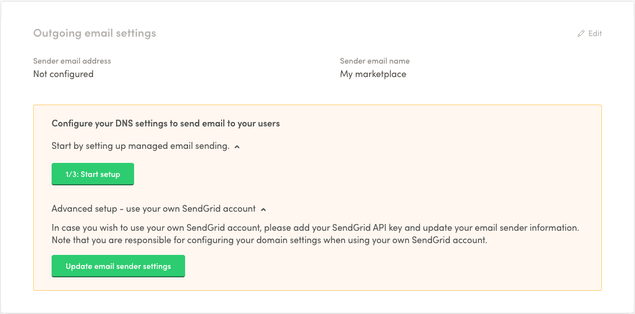
Head on to the General settings page in the Build section. You should see a wizard prompting you to select between managed setup or advanced setup:
Toggle the advanced setup visible:
Click the button and paste in your SendGrid API key.
Changing from managed to own account
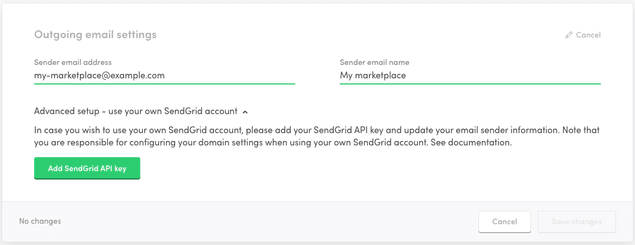
Head on to the General settings page in the Build section. Click Edit
under Outgoing email settings and toggle the Advanced setup visible:
Click the button and paste in your SendGrid API key.
That's it! If you have configured your key and SendGrid account correctly, you are good to go!
Summary
In this article, we went through the setup to configure a custom email address for your live marketplace. It is important to get all the steps done and validated to ensure that emails are working reliably.
If you have any questions or need a more advanced setup, you can contact Sharetribe support and we are happy to help you.


